Saturday, December 31, 2011
2012 watch out
Sunday, December 11, 2011
workshop @ pacific northwest art school


As promised (and now with laptop back) here are some photos of fugitive media silkscreen printing done by Sharon, Jill and I in October workshop with Kerr.
Tuesday, November 15, 2011

Monday, November 14, 2011
#15 of the Improvisational Quilts (from Judy)

A Quilt of Variation (from Judy)

It is big enough at this point (about 45 inches across) for me to see how it works. Next one, I think, I start at the upper left-hand corner and work linearly so I don't have to end up with a square. But it is a pretty interesting design principle, I think. One of the things I learned is that striped fabric is good and another is that vague prints are useless. Maybe stick to stripes and solids next time? If you have any thoughts about it/suggestions, I'd be happy to hear them. ---Judy
Thursday, October 20, 2011
Coupeville, continued
Some amazing pieces/samples coming
Wednesday, October 19, 2011
Coupeville, Wa
Sharon, Jill and I are attending a fibre workshop at the Pacific Northwest Art School..
If the laptop is functional will add pictures during the 5 days - if not you'll be able to see some of the days when I get home and get back online... Already have a fab sunrise from the front deck of the vacation rental we have....
take care
Sybil
Monday, August 29, 2011
Finishing Number 14!

And #15 is already up on the design wall. It's called 'What About the Parrot?'
Wednesday, August 24, 2011
Quilt Show
It's hard to know whether we will have too many quilts or not enough quilts when you have a small space but have only 14 or so members, not all of whom quilt. And we will have a little sale of quilted goods as well. Fortunately, I have these 14 quilts of the 'Improvised Quilt" series to use as the backbone, so we can use all of them or fewer of them if that is necessary. But it still makes for a nervous approach to the show.

Thursday, August 4, 2011
Meeting

Sunday, July 17, 2011
Quilting in Spain
If the link above doesn't work, go to
http://quiltsimprovisados.blogspot.com
--Judy
Thursday, July 14, 2011
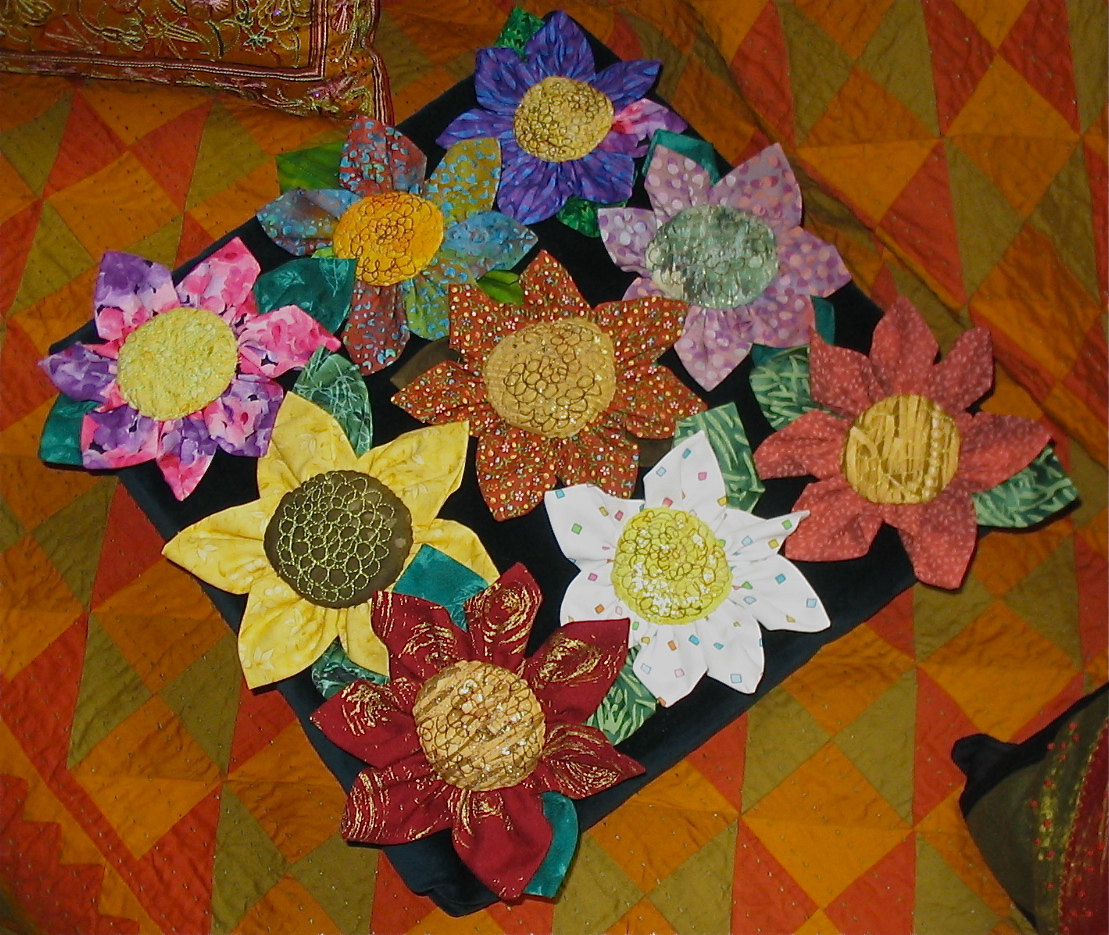
Another Quilted Basket


Judy
Thursday, June 30, 2011
Trees and Beyond


Friday, June 24, 2011
farbic forest / trees
It is my goal to take pictures of our display next week and create a cd/dvd that can be shared with those that can't see the show. also I will get pictures of each piece so we each have our piece for future reference..
have a great day of stitching
Saturday, May 28, 2011
Guild presentation
Saturday, May 21, 2011
And, Finished Piecing

In this, there is an orange gate, a rural tori gate, some wrapped fish, a bamboo forest, some cherry blossoms, and some ikebana flowers. plus a lot of vintage kimono fabrics, as well as the usual melange of special fabrics.
Tuesday, May 17, 2011
Lasagne Recipe
Mushroom Vegetarian Lasagna
1 pkg (10 oz/284 g) fresh spinach (I use one 10 oz bag)
3 tbsp. olive oil
3 shitake mushrooms, finely chopped
1 portobello mushroom (4 oz/125 g), finely chopped (I use 3) (and I use some regular mushrooms thrown in – everything finely chopped)
1 large shallot or small onion, finely chopped
1 jar (700 ml) spaghetti or pasta sauce (Bertolli Five Bros. Pasta, summer Tomato Basil) I use Classico)
1 jar (6oz/179g) marinated artichoke hearts, drained and chopped (I use 1 tin regular artichoke hearts)
1 1/2 tsp black pepper
8 oz (250g) spinach lasagna noodles (I use fresh plain ones)
8 oz bocconcini or mozzarella cheese, sliced or grated (I use one Bari package)
8 oz mascarpone or ricotta cheese
1 cup freshly grated parmesan cheese
1. Rinse and trim spinach, shaking off excess water. In saucepan, cook spinach, covered with just the water clinging to the leaves, over med-high heat for about 5 min. or until wilted. Drain in sieve, reserving cooking water. Press out excess moisture from spinach, chop coarsely and set aside. Penny didn't do this: she simply chopped the spinach and added it to the saucepan at Step #3.
2. In a large saucepan, heat oil over med-high heat. Cook shitake and portobello mushrooms and shallot, stirring often, for 5 minutes.
3. Stir in sauce, artichoke hearts, spinach and pepper. Add enough water to reserved cooking water to make 2/3 cup. Penny added artichoke water from the can. Stir water into sauce mixture. Bring to a boil. Reduce heat and simmer for 30 minutes.
4. Meanwhile in a large pot of boiling salted water, cook noodles for about 8 minutes or until tender but firm. Drain. Penny bought fresh pasta--no pre-cooking. Penny's getting impatient and lazy in her old age.
5. Spread about 1 cup of the sauce in the bottom of a 13x9 inch baking dish. Cover with one-quarter of the noodles, then one-quarter of the sauce. Top with one-third of the mozzarella cheese, then one-third of the ricotta, then 1/4 cup of the parmesan. Repeat the layers twice.
6. Arrange remaining noodles over the top, spread with remaining sauce and sprinkle with remaining parmesan.
7. Bake at 350 F oven for 30-40 minutes, or until bubbly. Let stand 5 minutes before serving. Makes 8 servings.
If using uncooked noodles, add more sauce liquid.
Brenda used 2 portobello mushrooms and regular mushrooms.
Wednesday, May 11, 2011
A Great Piece/Peace Falls
The piecing of number 13 is near done, but maybe 4-5 days before it is ready to be quilted, so there will be some resting for the fingers. What a nice feeling.

Monday, May 9, 2011


Saturday, May 7, 2011
Taking My Own Advice

judy
Friday, May 6, 2011
Getting Everyone Out...
"When you start working, everybody is in your studio--your friends, enemies, the art world and, above all, your own ideas--all are there. But as you continue painting, they start leaving, one by one, and you are left completely alone. Then, if you're lucky, even you leave."
As good a description as any I've ever read what it is like to be in a creative mode.
Judy
Monday, April 25, 2011
Fabric Bowls/Baskets
Then i painted both sides with slightly thinned white acrylic paint. I didn't have house paint at hand. After it dried, I put some red metallic shiva stick on it, in no particular manner: just to bring out the stitching here and there with some red shininess.
Next, I cut the square up into the pieces to make the basket (i can tell you how that's shaped if anyone is interested) and sewed the three pieces together and, Voila! Here's the photo. (again, it's about 10 inches wide and 5 inches high and 3 inches deep.

The red flower was just something hanging around and it's just pinned to it. I liked the 'ears' standing up this way, although previously i have fastened them down in a loop with rivets. If i decide to keep the flower, i'll probably velcro it on.
judy
Tuesday, April 19, 2011
Progress on Trees

There's a rabbit down at the bottom in the brush, and a bird on each tree limb 'arm.'
also, here's a link to the fabric baskets that I talked about at the meeting today.
judy ross
Saturday, March 26, 2011
playing


Tuesday, March 1, 2011
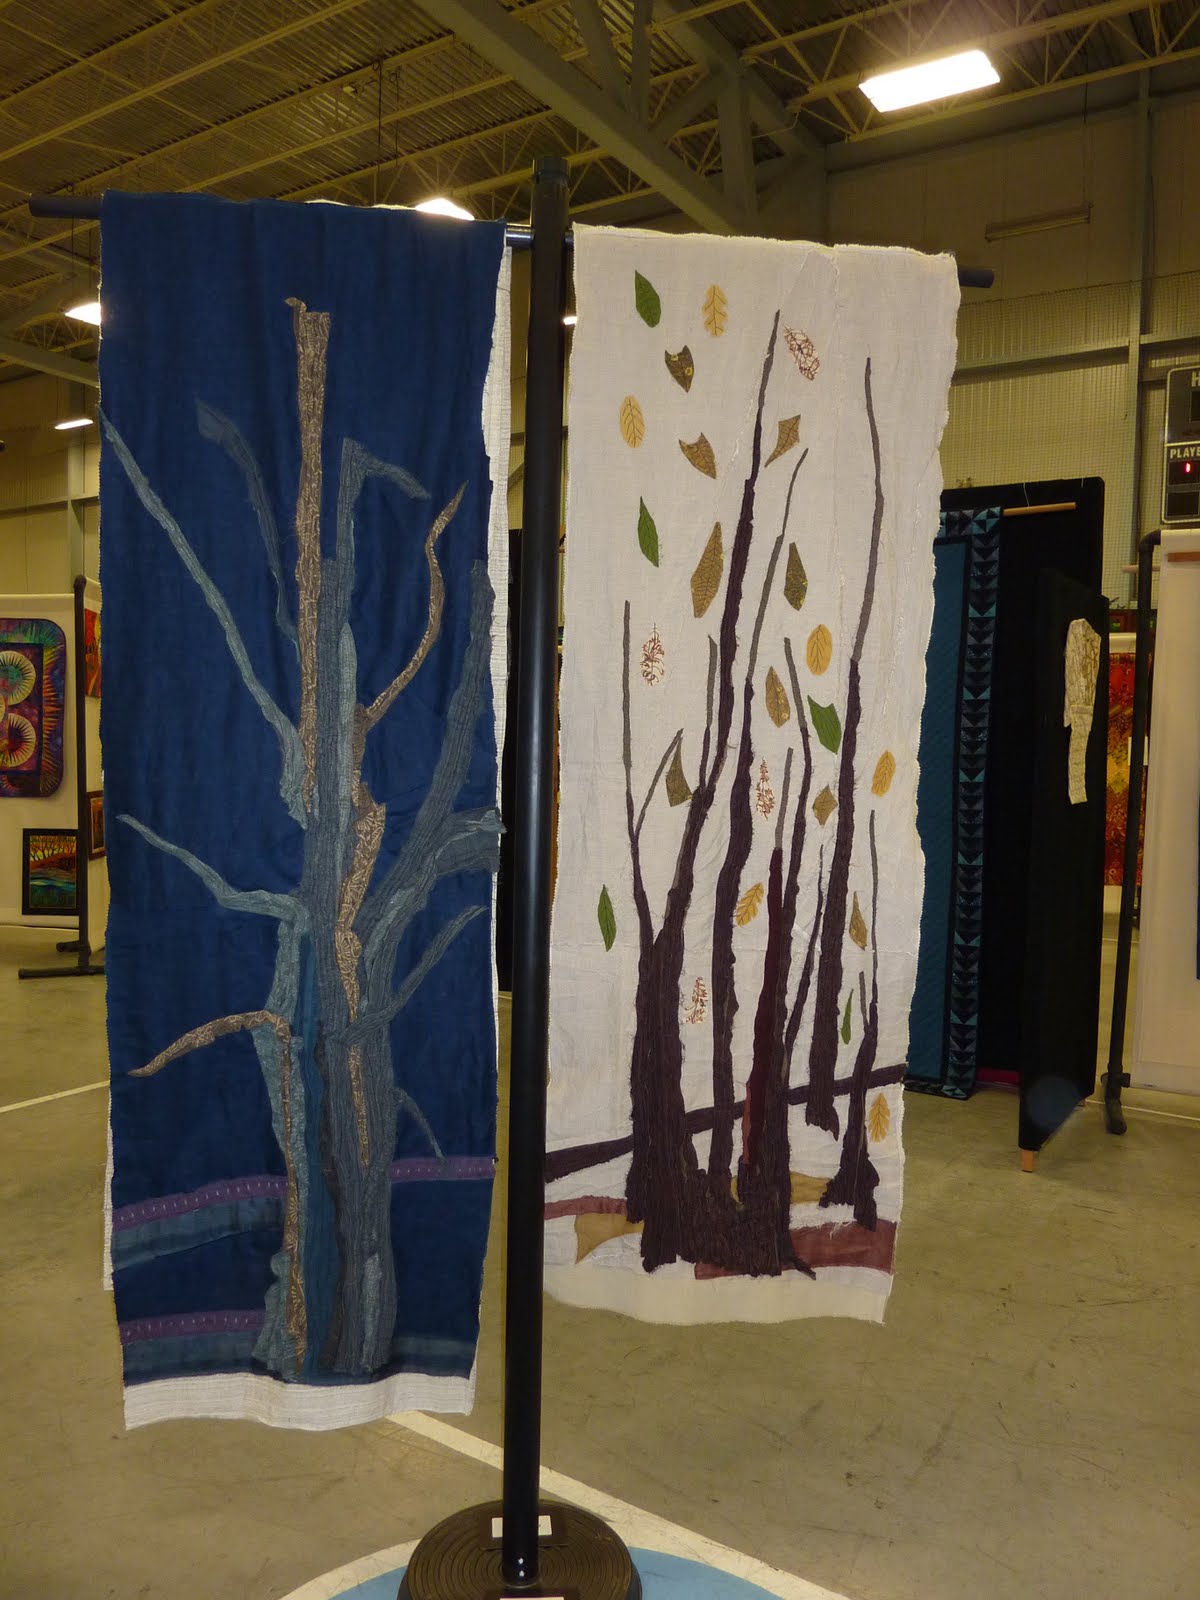
Seasons of a Tree

Tuesday, February 1, 2011
Big Tree Project, Stage II

Thursday, January 20, 2011
Big Tree Project

Update below.
This is the first of the four panels (spring, summer, fall, winter) of the same basic tree/landscape form. the leaves on the autumn tree are cut out with pinking sheers from painted silk paper. There will be a lot more leaves, but i didn't see a lot of point to pinning them all on .. you can get the point. i think the spring flowers will be washaway lace and the summer leaves crocheted . but i'm not sure of that yet. each piece is about 19 inches square, so the whole thing with some dividers will be 80 inches.
I removed the earlier picture and replaced it with the finished Autumn section.
Thursday, January 13, 2011
Trees, More..

It helps to be thinking about trees, thinking about ideas regularly, I find.